Locations Administration
Administration of locations is restricted to users with the the system role of IMIS Administrator or with a role including an access to Administration/Locations. The user can see only locations he/she has access to.
Pre-conditions
A region, district, municipality or village may only be added or thereafter edited, after the approval of the management of the scheme administration.
Navigation
All functionality for use with the administration of locations can be found under the main menu
Administration, sub menuLocations.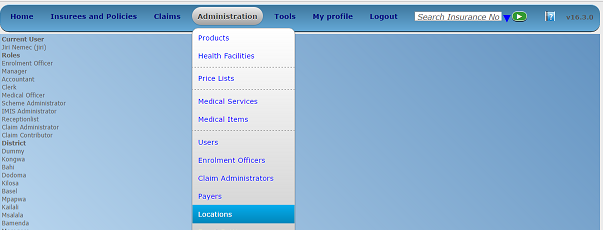
Image 82 - Navigation Locations
Clicking on the sub menu
Locationsre-directs the current user to the Locations Page.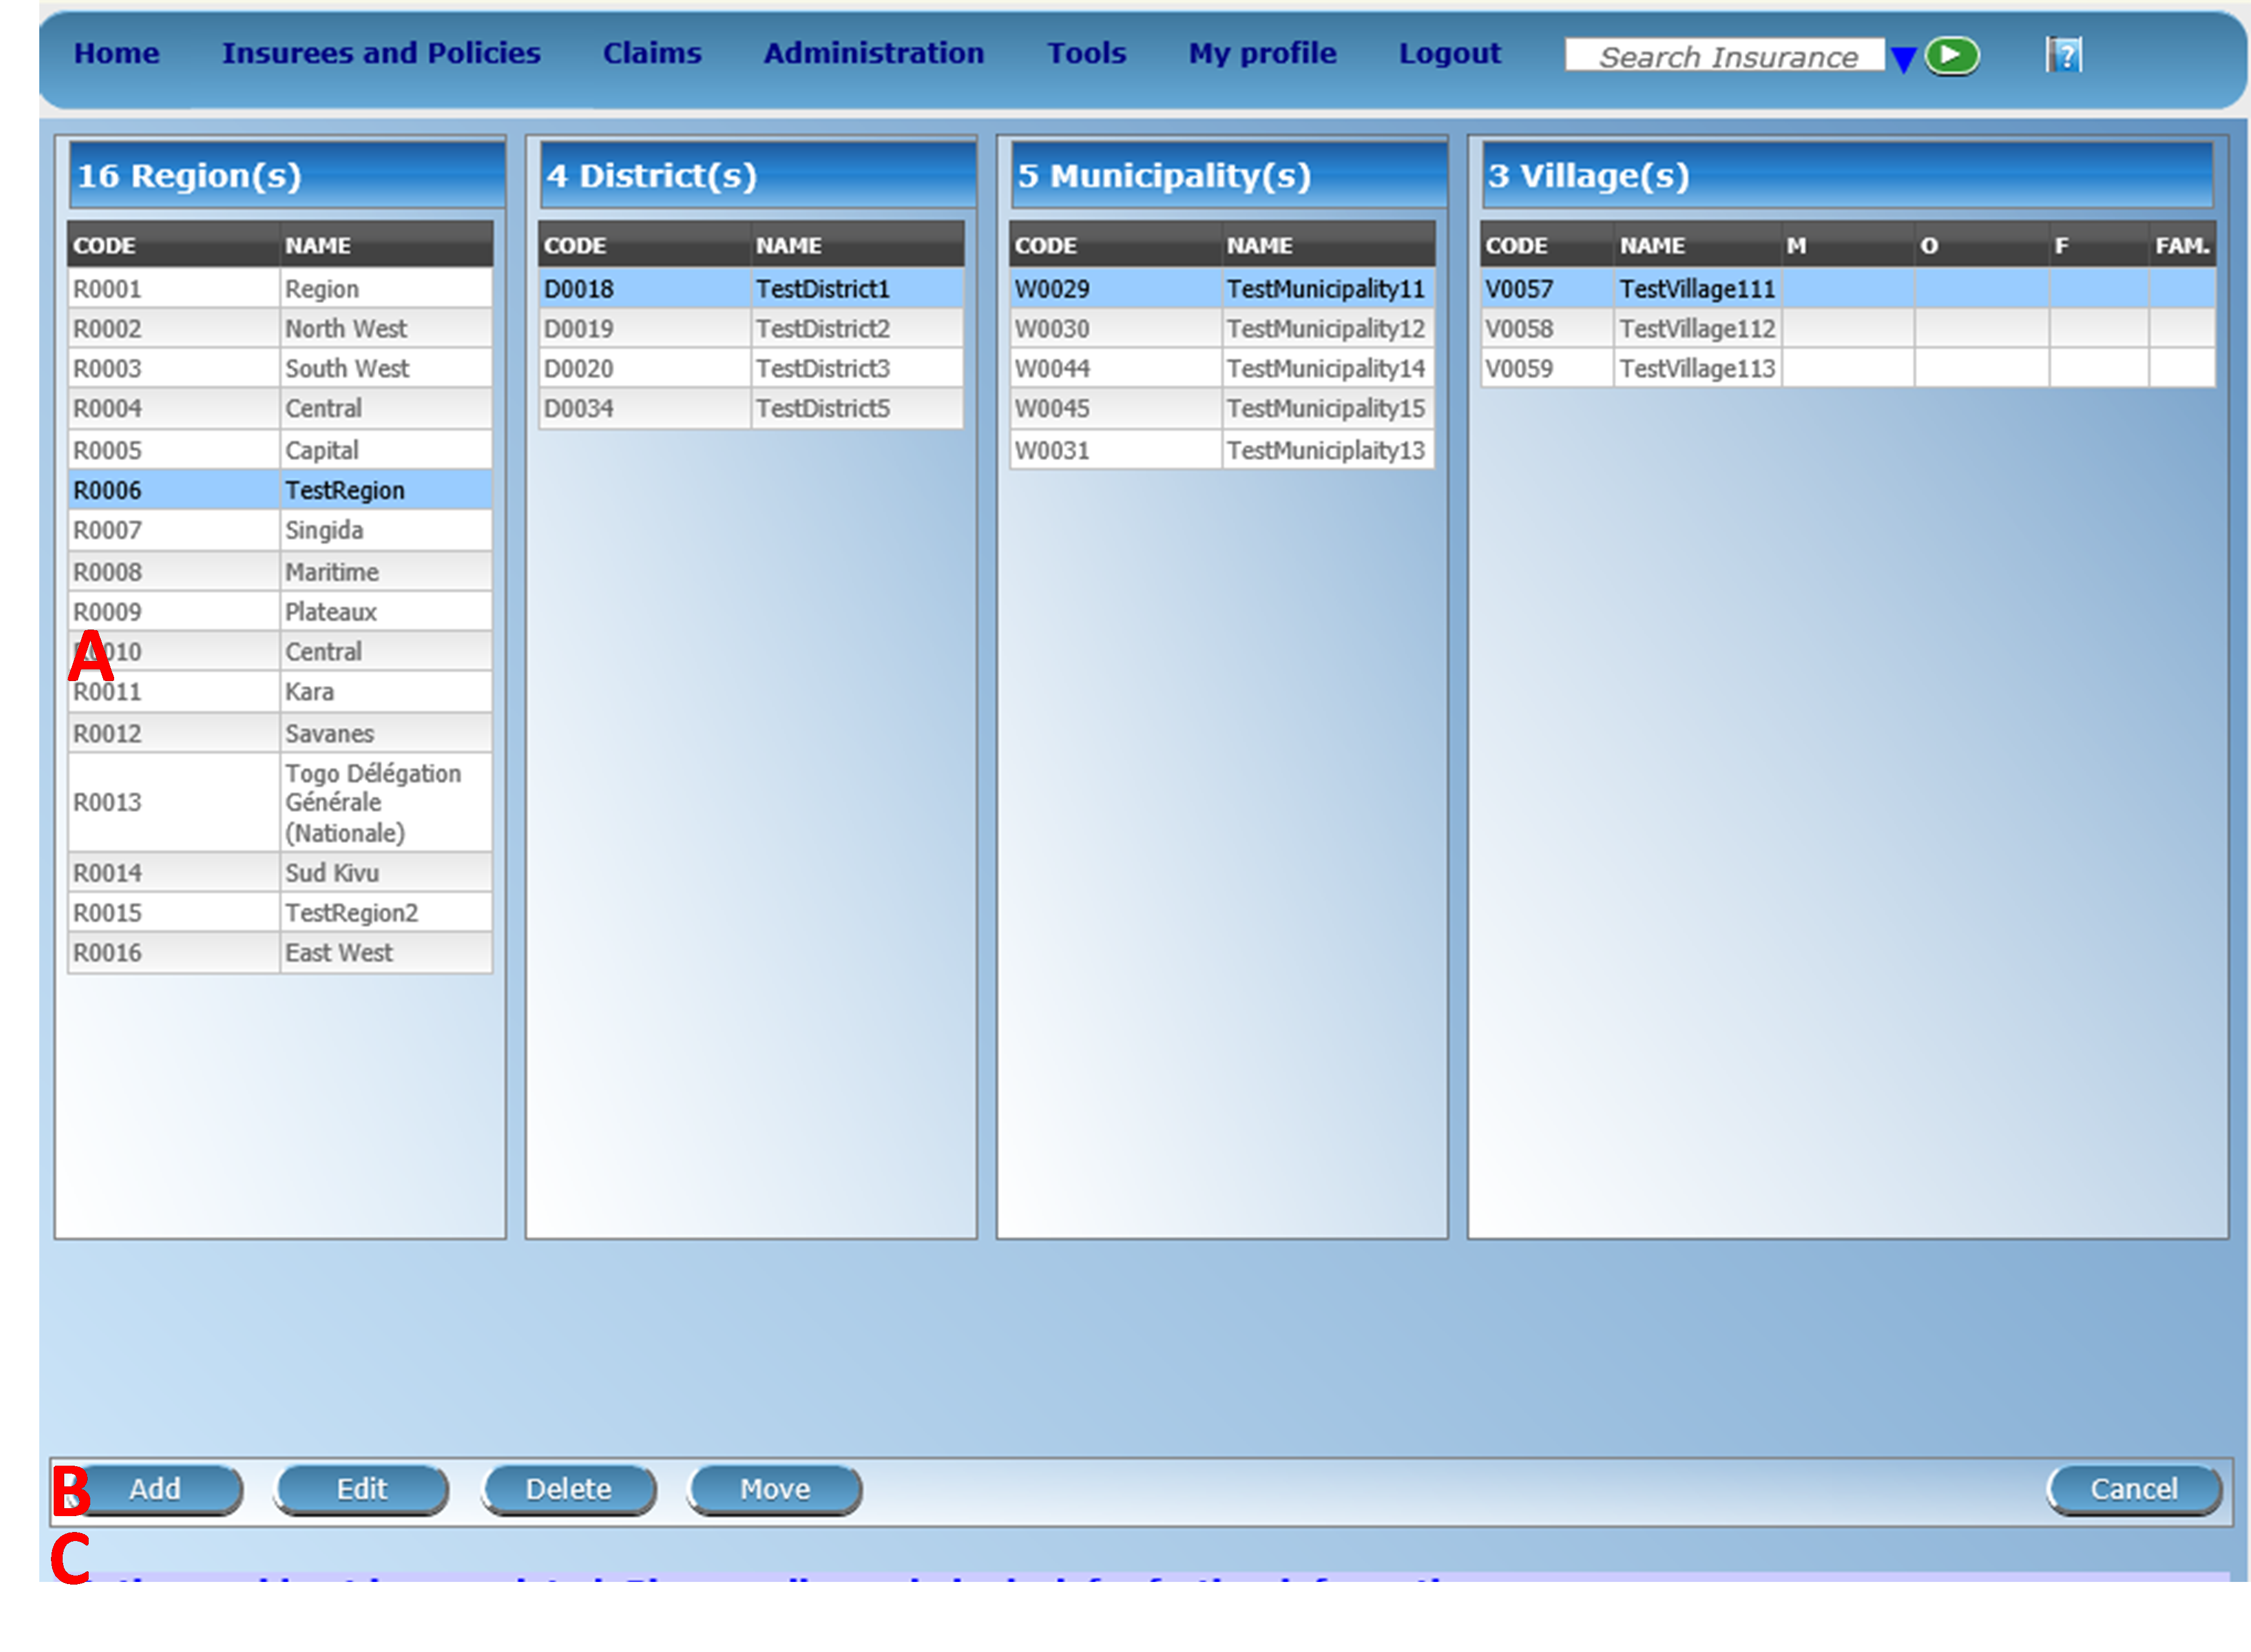
Image 83 - Locations Page
Locations Page
The Locations page is the central point for all locations administration. By having access to this page, it is possible to add, edit, delete and move regions, districts, municipalities and villages. The page is divided into three panels (Image 83). Note. Only regions and districts with associated municipalities and villages, belonging to the logged in user will be available to edit or delete. On adding a new region or district, the user will automatically become associated with this region or district.
Locations Panel
This is the working panel and is divided into four vertical panels of
Regions, Districts, MunicipalitiesandVillages.Button Panel
It has four buttons,
Add,Edit,DeleteandMovefor actions on the locations and theCancelbutton for re-directing to the Home Page.
Image 84 - Action Buttons - Locations Page
Information Panel
The Information Panel is used to display messages back to the user. Messages will occur once a region, district or municipality or village has been added, updated, moved or deleted or if there was an error at any time during the process of these actions.
Cancel
By clicking on the
Cancelbutton, the user will be re-directed to the Home Page.
Adding a Region, District, Municipality, Village
Focusing on the appropriate level of locations by clicking on the black or the empty bar on the top of the appropriate panel and clicking on theAddbutton will open up in the top of the screen an empty entry box. Here one could enter the new code (Code) and name (Name) of a region, district, municipality or village. For villages, the number of male inhabitants (M), female inhabitants (F), inhabitants with the unspecified gender (O) and the number of families (Fam.) can be specified. On clicking theSavebutton the new record will be saved.
Editing a Region, District, Municipality, Village
Selecting the location to edit and clicking on theEditbutton will open up in the top of the screen an entry box with the name of the location. Here one could change the name. On clicking theSavebutton, the record will be saved.
Deleting a Region, District, Municipality, Village
Select first the location to delete and click the
Deletebutton. Note. It is not possible to delete a region, district or municipality with associated districts, municipalities or villages respectively.Before deleting a confirmation popup (Image 85) is displayed, which requires the user to confirm if the action should really be carried out?
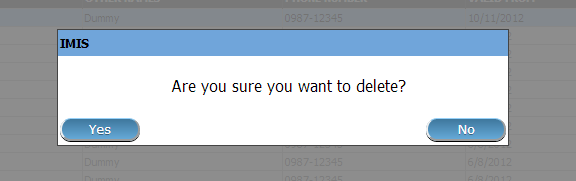
Image 85 - Delete confirmation – Location Page
When a region, district, municipality or village is deleted, all records retaining to the deleted region, district, municipality or village will still be available by selecting historical records.
Moving a District, Municipality, Village
Moving of a location is needed when the administrative division of the territory, on which a health insurance scheme is active, changes. Clicking on the
Movebutton will re-direct to the Move Location Page (Image 86).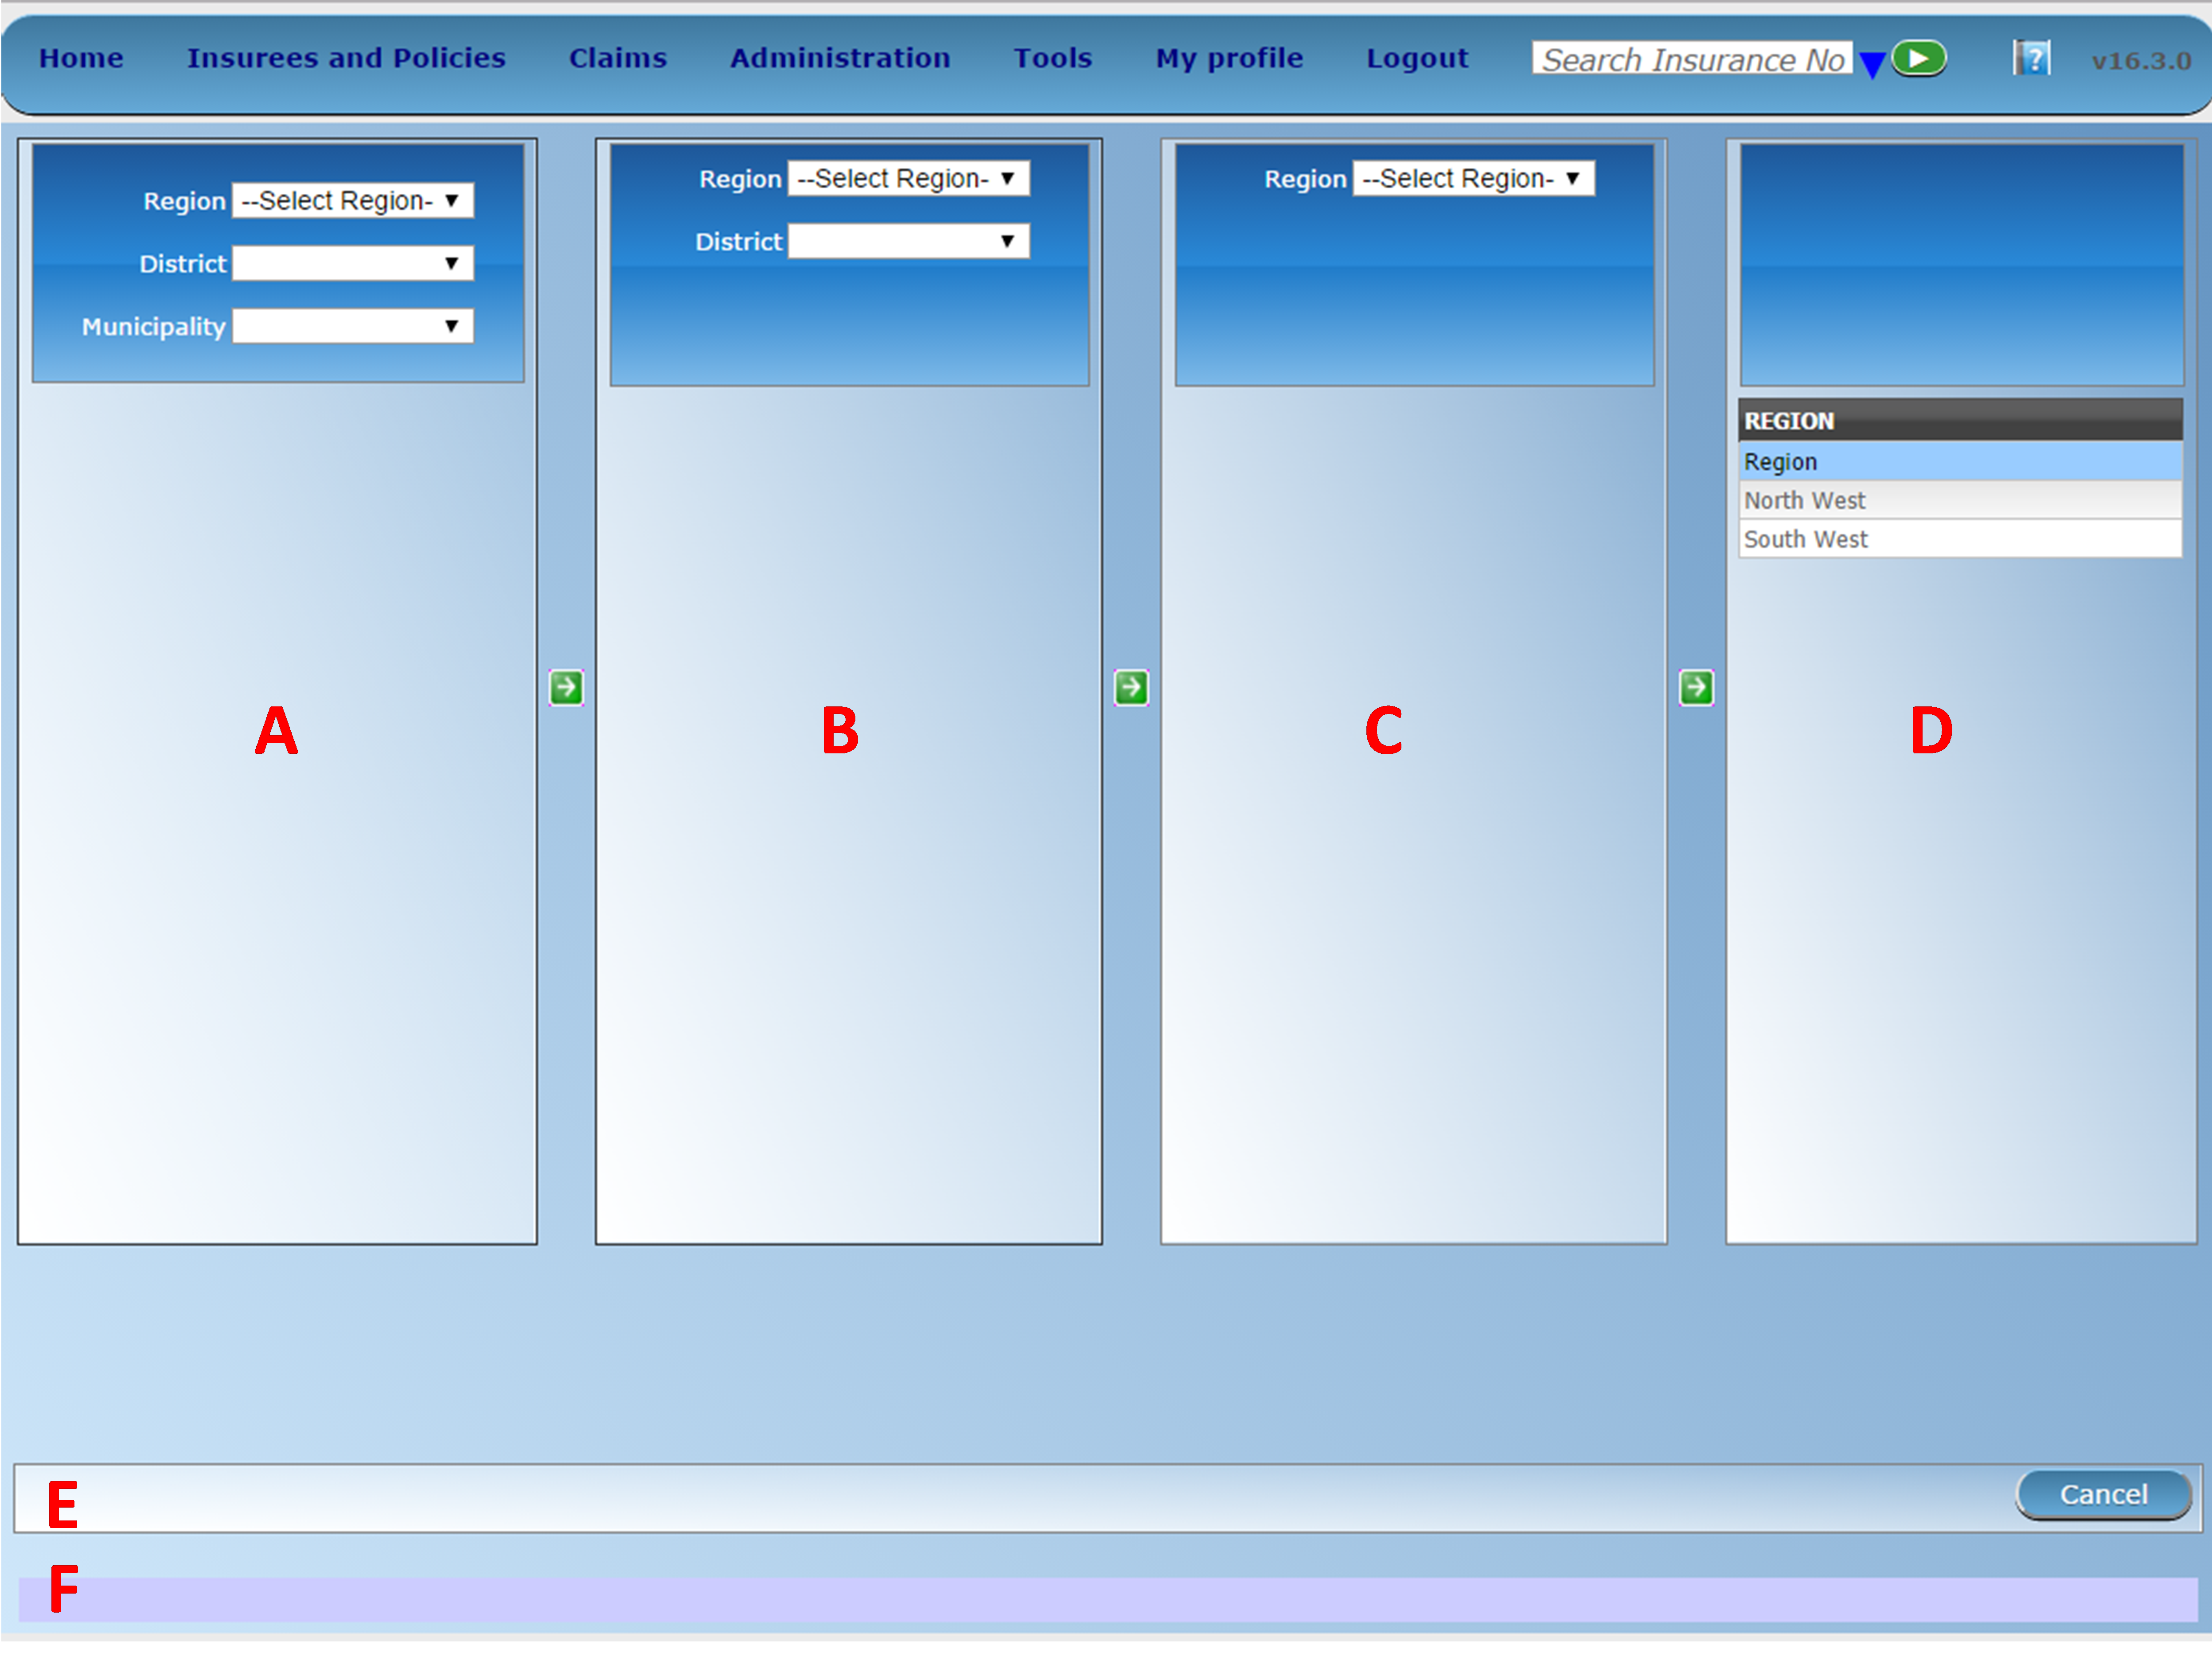
Image 86 - Move Location Page
The
Move Location Pageis divided into six panels.
Locations Panels (A ,B,C,D)
The pair of A and B panels is used for moving of a village to another municipality. The pair of B and C panels is used for moving of a municipality to another district. The pair C and D is used for moving a district to another region.
For moving a location, select a location (village, municipality, district) in two adjacent panels by selecting of higher level locations in the fields
Region, District, Municipalityand clicking on the selected location (village, municipality, district) in a panel and on a new parent location in the next panel.Actual moving of a location into a new parent locations is done by clicking on the green arrow between the two corresponding location panels.
Button Panel
It has only the
Cancelbutton for re-directing to the Location Page.Information Panel
The Information Panel is used to display messages back to the user. Messages will occur once a district, municipality or village has been moved or if there was an error at any time during the process of this action.