Heath Facility Claims
Table of Contents
Pre-conditions
Access to the Health Facility Claims Page is restricted to users with the role of Claim Administrator.
Navigation
All functionality for use with the administration of health facility claims can be found under the main menu Claims, sub menu Health Facility Claims.

Img. 9 Image - Navigation Health Facility Claims
Clicking on the sub menu Health Facility Claims re-directs the current user to the Claims Control Page.
Claims Control Page
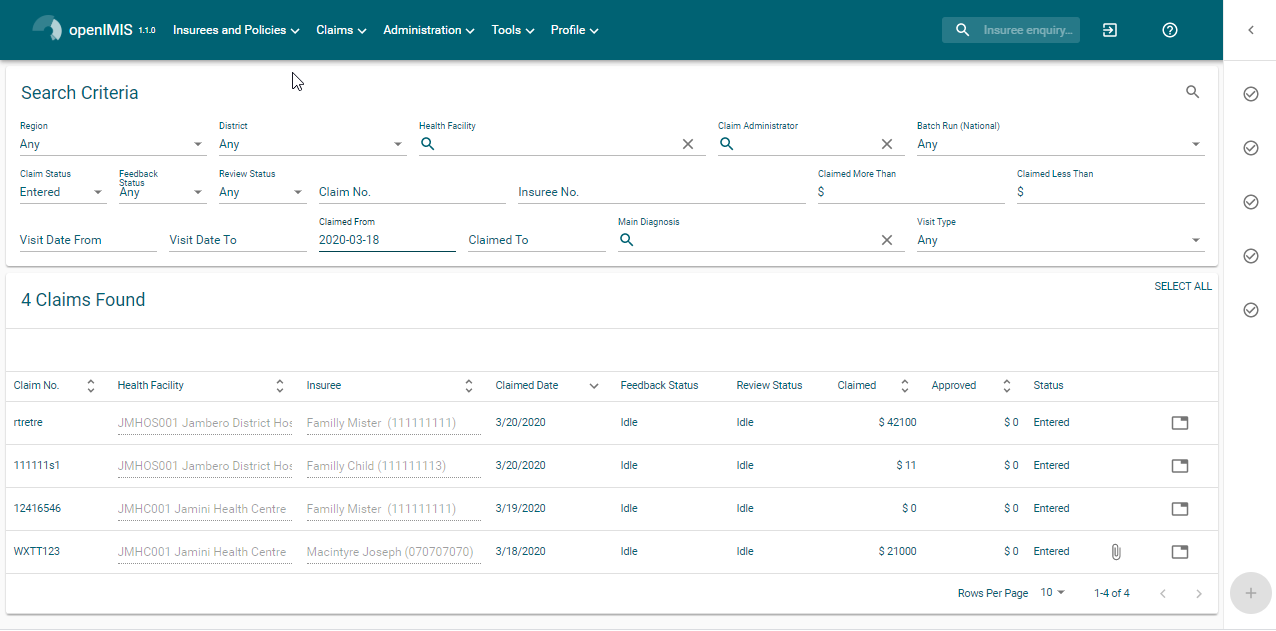
Img. 10 Image - Claims Control Page
The Claims Control Page is the central point for all health facility claim administration. By having access to this panel, it is possible to add, edit and search claims. Claims can be edited only in the state Entered. The panel is divided into four panels (Img. 10).
Search Panel
The search panel allows a user to select specific criteria to minimise the search results. In the case of claims the following search options are available which can be used alone or in combination with each other.
- Region
- Select the
Regionwhere claiming or searched for health facility is located from the list of regions by clicking on the arrow on the right of the selector to select claims from a specific region. Note: The list will only be filled with the regions assigned to the current logged in user. If this is only one then the region will be automatically selected - District
- Select the
districtwhere claiming or searched for health facility is located from the list of districts by clicking on the arrow on the right of the selector to select claims from a specific district. Note: The list will only be filled with the districts belonging to the selected region and assigned to the current logged in user. If this is only one then the district will be automatically selected. - HF Code
- Select the
HF Code(Health Facility Code) from the list of codes of health facilities by clicking on the arrow on the right of the selector, to select claims from a specific health facility. Note: The list will only be filled with the health facilities belonging to the selected district and assigned to the current logged in user. - HF Name
- Type in the beginning of; or the full
HF Name(Health Facility Name) to search for claims belonging to the health facility whose name start with or match completely the typed text. - Claim Administrator
- Select the
Claim Administratorfrom the list of claim administrators by clicking on the arrow on the right of the selector, to select claims submitted by a specific claim administrator. Note: The list will only be filled with the claim administrators belonging to the health facility selected. - Visit Type
- Select the
Visit Typefrom the list of visit types (or hospital stays) by clicking on the arrow on the right of the selector, to select claims with specified visit type. - Insurance Number
- Type in the beginning of; or the full
Insurance Number, to search for claims, on behalf of insurees with the insurance number which starts with or match completely the typed text. - Claim No.
- Type in the beginning of; or the full
Claim No., to search for claims with the specific claim identification which starts with or match completely the typed text. - Review Status
- Select the
Review Statusfrom the list of options for review status by clicking on the arrow on the right of the selector, to select claims with specific review status. - Feedback Status
- Select the
Feedback Statusfrom the list of options for feedback status by clicking on the arrow on the right of the selector, to select claims with specific feedback status. - Claim Status
- Select the
Claim Statusfrom the list of options for claim status by clicking on the arrow on the right of the selector, to select claims with specific claim status. - Main Dg.
- Select the Main diagnosis from the list of diagnoses status by typing text, all diagnoses containing the typed text will appear and be selectable underneath the box, to select claims with main diagnosis.
- Batch Run
- Select the
batch runfrom the list of batch runs by clicking on the arrow on the right of the selector, to select claims from specific batch run - Visit Date From
- Type in a date; or use the Date Selector (Date Picker), to search for claims with a
Visit Date Fromdate which is on or is greater than the date typed/selected. Note. To clear the date entry box; use the ``Clear`` button on the date picker popup.Visit Date Fromshould be the day of admission for in-patient care or the visit date in case of out-patient care. - Visit Date To
- Type in a date; or use the Date Selector (Date Picker), to search for claims with a
Visit Date Fromdate which is on or is less than the date typed/selected. Note. To clear the date entry box; use the ``Clear`` button on the date picker popup.Visit Date Toshould be the day of discharge for in-patient care or the visit date in case of out-patient care. - Claim Date From
- Type in a date; or use the Date Selector (Date Picker), to search for claims with a
Claim Datedate which is on or is greater than the date typed/selected. Note. To clear the date entry box; use the ``Clear`` button on the date picker popup* - Claim Date To
- Type in a date; or use the Date Selector (Date Picker), to search for claims with a
Claim Datedate which is on or is less than the date typed/selected. Note. To clear the date entry box; use the mouse to highlight the full date and then press the space key. - Search Button
- Once the criteria have been entered, use the search button to filter the records, the results will appear in the Result Panel.
Result Panel
The Result Panel displays a list of all claims found, matching the selected criteria in the search panel. The currently selected record is highlighted with light grey. (Img. 11). Double click on the line re-directs the user to the actual record for detailed viewing if it is a historical record or editing if it is the current record.
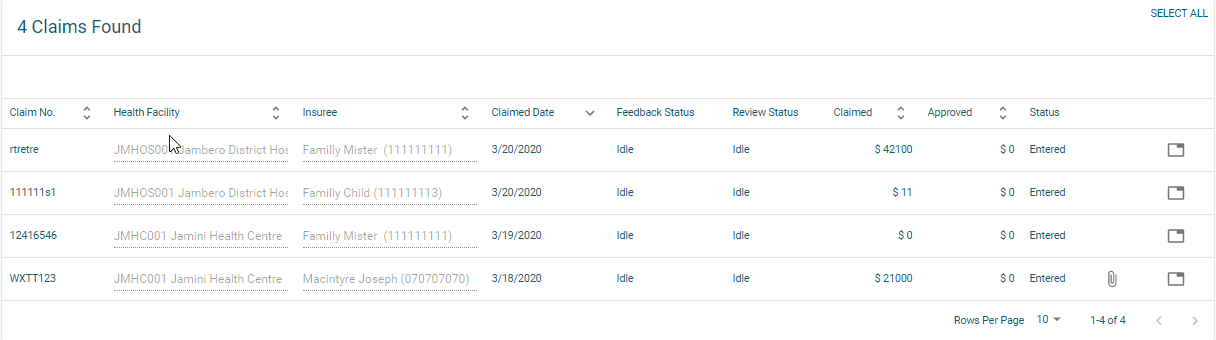
Img. 11 Selected record (grey) - Result Panel
A maximum of 10 records can be displayed per default but it can be changed by configuration (gitHub), in a scroll panel. Further records can be viewed by either changing the page or deleting/submitting the current loaded claims and search claims again.
Actions
Modular openIMIS comes with Material UI this means that there is a single button (Tab. 1) which fonction will change depending on the context (Icon change), for less used functions a tree dots menu is available (Tab. 2) only when claim(s) are selected. By double-clicking on the claim line, the user is directed to the Claim Page, where the current selected claim can be edited (provided it in the state Entered), this page will open with the current information loaded into the data entry fields. See the Claim Page for information on the data entry and mandatory fields.

Img. 12 Add |

Img. 13 Save |

Img. 14 Back |

Img. 15 Print |

Img. 16 Select all |

Img. 17 Tree dots |
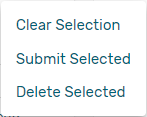
Img. 18 Tree dots menu |
- Add
- By clicking on the add button (Img. 12), the user is directed to the Claim Page, where new entries for new claim can be added. When the page opens all entry fields are empty. See the Claim Page for information on the data entry and mandatory fields.
- Submit selected
By clicking on the submit selected manu (Img. 18), claim status of all selected claims with the status Entered will be submitted.
Once the process is done, a popup window ( Img. 19 ) with the result of the process will be shown.
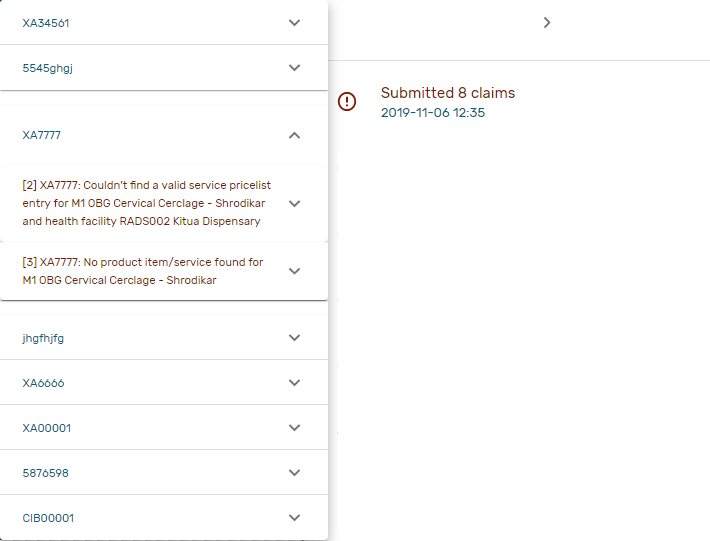
Img. 19 Submitted Claims details – Claims Control Page
- Delete selected
By clicking on the delete selected menu, the current selected claim will be deleted.
Before deleting a confirmation popup ( Img. 20 ) is displayed, which requires the user to confirm if the action should really be carried out?
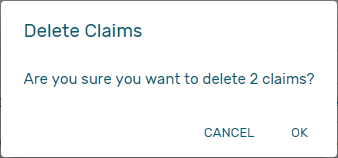
Img. 20 Delete confirmation – Claims Control Page
Information Panel
The Information Panel is used to display messages back to the user. Messages will occur once a claim has been added, updated or deleted or if there was an error at any time during the process of these actions.
Claim Page
Main Form
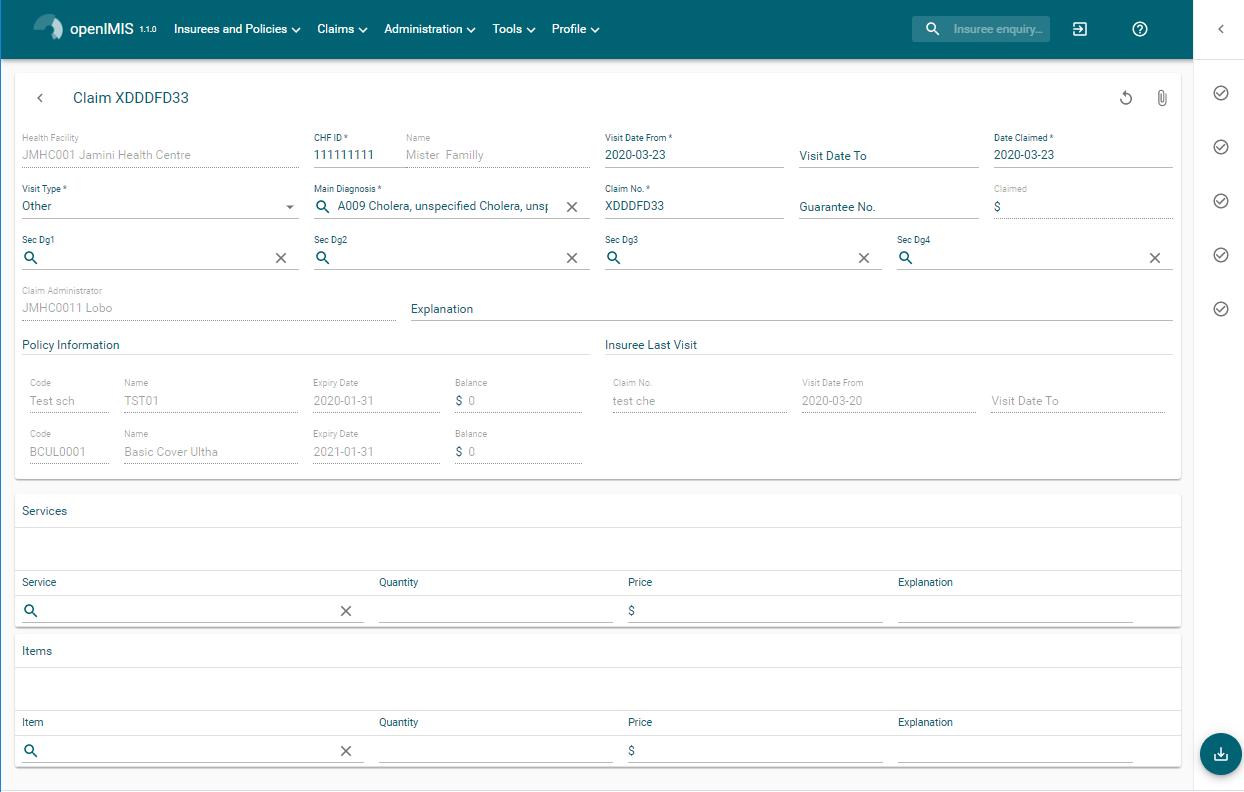
Img. 21 Claim Page
- HF Code
- Displays the code of the health facility. The field is read only (taken over from the Claims Control Page) and cannot be edited.
- HF Name
- Displays the name of the health facility. The field is read only (taken over from the Claims Control Page) and cannot be edited.
- Insurance Number
Enter the insurance number of the patient. When the field is filled the insuree name will be updated (:refnum:’insuree_picker’). Mandatory.

Img. 22 Search insuree popup
- Claim No.
- Enter the identification of the claim. Mandatory, up to 8 characters. It should be unique within the claiming health facility.
- Main Dg.
- Select the code of the main diagnosis by typing text, all diagnoses containing the typed text will appear and be selectable underneath the box. Mandatory.
- Sec Dg 1
- Select the code of the first secondary diagnosis by typing text, all diagnoses containing the typed text will appear and be selectable underneath the box.
- Sec Dg 2
- Select the code of the second secondary diagnosis by typing text, all diagnoses containing the typed text will appear and be selectable underneath the box
- Sec Dg 3
- Select the code of the third secondary diagnosis by typing text, all diagnoses containing the typed text will appear and be selectable underneath the box
- Sec Dg 4
- Select the code of the fourth secondary diagnosis by typing text, all diagnoses containing the typed text will appear and be selectable underneath the box
- Claim Administrator
- Displays code of the claim administrator. The field is read only (taken over from the Claim Control Page) and cannot be edited.
- Visit Date From
- Enter the visit date for out-patient care or the admission date for in-patient care. Mandatory.
- Visit Date To
- Enter the discharge date for in-patient care.
- Date Claimed
- Enter the date when the claim was prepared by the health facility.
- Guarantee No.
- Enter identification of a guarantee letter for prior approval of provision of claimed health care.
- Visit Type
- Select the type of visit/hospital admission from the drop down list (Emergency, Referral, Other)
Services
- Service code
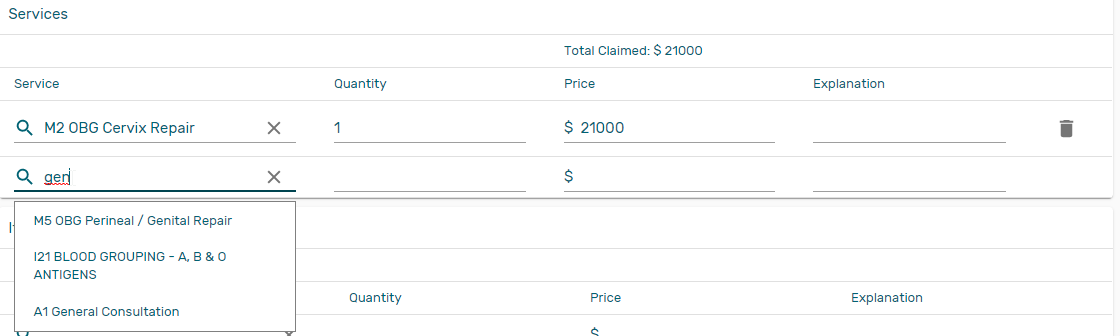
When entering the service code, a dropdown suggestion box for the available services with the service code or service name matching your typed text will be shown. Available medical services in the dropdown suggestion box are taken over from the pricelist of medical services associated with the claiming health facility. The desired service can then be selected from the dropdown suggestion box by clicking on it using mouse or selecting it using up and down arrows, then pressing Enter key fill the service code text field, together with quantity and value field in the same row.
Once the selected service has been written on the service data grid row, a new service line will be added and the dropdown suggestion box will close itself. When needed, the dropdown suggestion box can be closed by clicking any place on the page but outside the dropdown suggestion box.
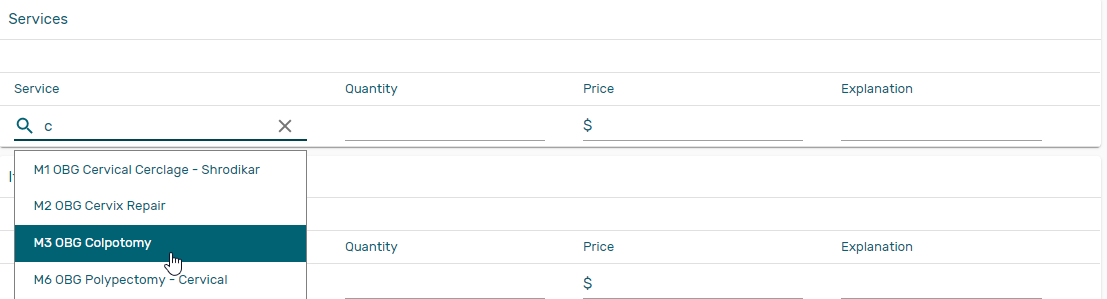
Img. 23 Services dropdown suggestion box – Claim Page
- Quantity
- This field can be filled manually by entering a number in it or automatically is filled by 1 when the service code above is filled, through dropdown suggestion box. It is this field that receives focus after service code is filled above from the dropdown suggestion box.
- Price
- This field can be filled manually by entering a number in it or automatically is filled when the service code above is filled, through dropdown suggestion box. Automatically filled prices are taken over from the pricelist of medical services associated with the claiming health facility.
- Explanation
- Enter extra information about the service for the scheme administration (a medical officer of the scheme administrator).
Items
- Item code
When entering the item code, a dropdown suggestion box for the available items with the item code or item name matching your typed text will be shown. Available medical items in the dropdown suggestion box are taken over from the pricelist of medical items associated with the claiming health facility. The desired item can then be selected from the dropdown suggestion box by clicking on it using mouse or selecting it using up and down arrows, then pressing Enter key to fill the item code text field, together with quantity and value field in the same row.
Once the selected item has been written on the item data grid row, a new service line will be added and the dropdown suggestion box will close itself. When needed, the dropdown suggestion box can be closed by clicking any place on the page but outside the dropdown suggestion box.
Img. 24 Items dropdown suggestion box – Claim Page
- Quantity
- This field can be filled manually by entering a number in it or automatically is filled by 1 when the item code above is filled, through dropdown suggestion box. It is this filled that receives focus after item code is filled above from the dropdown suggestion box.
- Price
- This field can be filled manually by entering a number in it or automatically is filled when the item code above is filled, through dropdown suggestion box. Automatically filled prices are taken over from the pricelist of medical items associated with the claiming health facility.
- Explanation
- Enter extra information about the medical item for the scheme administration (a medical officer of the scheme administrator).
- Claimed
- This field is filled automatically with a new total of quantities multiplied to their corresponding values in both data input grids at any time when there is a change in values in the either quantity fields or value fields anywhere in both data input grids.
- Explanation
- Enter extra information about the whole claim for the scheme administration (a medical officer of the scheme administrator).
Saving
Once all mandatory data is entered, clicking on the Save button (Img. 13) will save the claim. The user stay in the Claim Page; a message confirming that the claim has been saved will appear on the right of the Claim Page (Tab. 3).

Img. 25 Create confirmation |

Img. 26 Update confirmation |
Img. 27 Back |
Img. 28 Print |
If mandatory data is not entered at the time the user clicks the Save button, a message will appear in the Information Panel, and the data field will take the focus (by an asterisk).
Printing of a claim
By clicking on the
Restoring/Duplicating a claim
By clicking on theRestorebutton, the Claim Page is cleared filled with a new calim having the same details, at the exeption of the claimID that get a leading “@”
Creating of a new claim
By clicking on theAddbutton (Img. 12), the Claim Page is cleared (with exception of HF Code, HF Name and Claim Administrator) and it ready for entering of a new claim for the same health facility and of the same claim administrator as before.
Back