Review claims
The functionality allows reviewing and adjustments of claims from medical point of view. Reviewing of claims is restricted to users with the system role of Medical Officer or with a role including an access to Claims/Claim/Review.
Pre-conditions
A claim has been already submitted.
Navigation
All functionality for use with the administration of claim overview can be found under the main menu
Claims, sub menuReviews.
Img. 30 Navigation Review
Clicking on the sub menu
Reviewre-directs the current user to the Claims Overview Page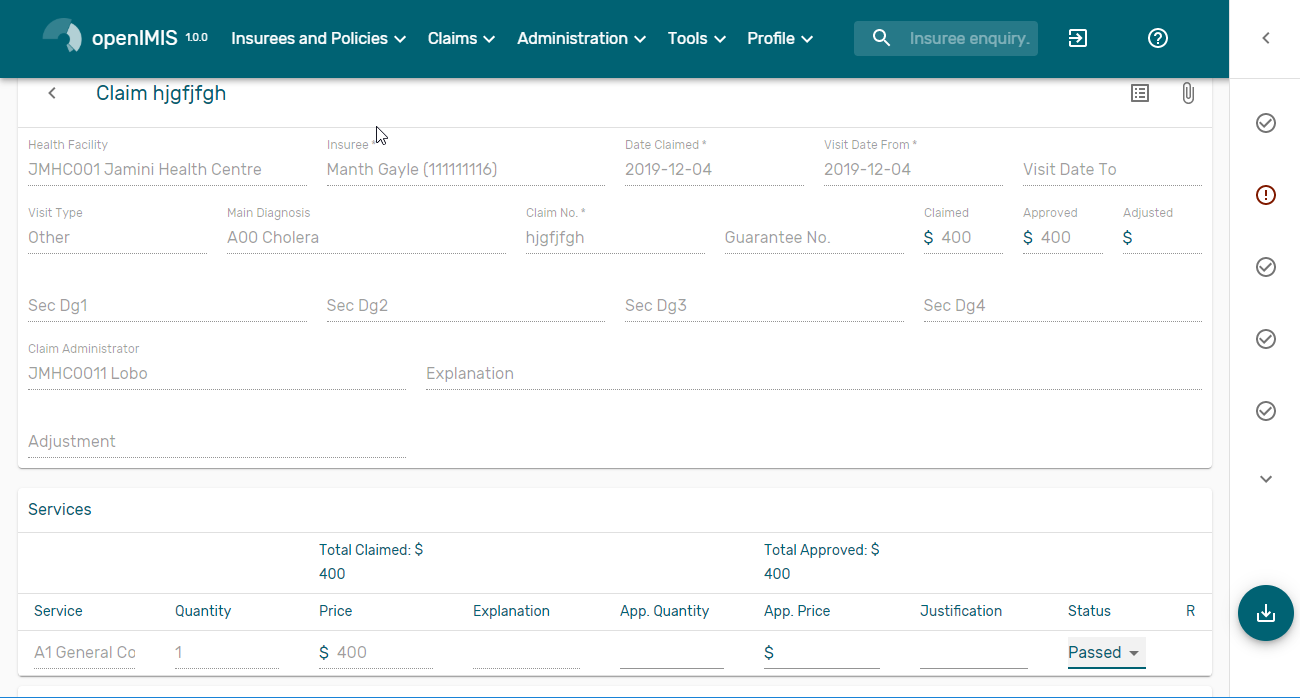
Img. 31 Image - Claims Overview Page
Claims Overview Page
The Claims Overview Page is the central point for all claim review administration. By having access to this panel, it is possible to review, feedback, amend and process claims. The panel is divided into five sections (Img. 31).
Search Panel
The search panel allows a user to select specific criteria to minimise the search results. In the case of claims the following search options are available, which can be used alone, or in combination with each other.
RegionSelect the
Region; from the list that appear after typing characters, all region containing the typed text will appear and be selectable underneath the box. Note: The list will only be filled with the regions assigned to the current logged in user. If this is only one then the region will be automatically selected
DistrictSelect the
District; from the list that appear after typing characters , all district containing the typed text will appear and be selectable underneath the box. Note: The list will only be filled with the districts belonging to the selected region and assigned to the current logged in user. If this is only one then the district will be automatically selected
HF CodeSelect the
HF Code; from the list that appear after typing characters, all HF code containing the typed text will appear and be selectable underneath the box. Note: The list will only be filled with the health facilities belonging to the selected district and assigned to the current logged in user.
HF NameType in the beginning of; or the full
HF Name, to search for claims belonging to the health facility whose name start with or match completely the typed text
Claim AdministratorSelect the
claim administratorfrom the list that appear after typing characters , all claim administrator containing the typed text will appear and be selectable underneath the box. Note: The list will only be filled with the claim administrators belonging to the health facility selected.
Insurence NumberEnter the insurance number of the patient. When the field is selected, the search insuree popup(:refnum:’insuree_picker’) will be display and will allow the claim administrator to search the insuree based on its insurance number, or/and last name, or/and other(first) name
Claim NoType in the beginning of; or the full
Claim No, to search for claims with claim identification which start with or match completely the typed text.
Review StatusSelect the
Review Statusfrom the list of the options for review status by clicking on the arrow on the right of the selector to select claims with a specific review status
Feedback StatusSelect the
Feedback Statusfrom the list of the options for feedback status by clicking on the arrow on the right of the selector to select claims with a specific feedback status
Claim StatusSelect the
Claim Statusfrom the list of the options for claim status by clicking on the arrow on the right of the selector to select claims with a specific claim status.
Main DgSelect the
Main Dg.from the list of diagnoses by typing characters, all diagnoses containing the typed text will appear and be selectable underneath the box, to select claims with main diagnosis.
Batch RunSelect the
Batch Runfrom the list of batch runs by clicking on the arrow on the right of the selector to select claims included in a specific batch run.
Visit Date FromType in a date; or use the Date Selector (Tab. 18), to search for claims with a
Visit Date Fromwhich is on or is greater than the date typed/selected. Note. To clear the date entry box; use the ``Clear`` button on the date picker popup.
Visit Date ToType in a date; or use the Date Selector (Tab. 18), to search for claims with a
Visit Date Towhich is on or is less than the date typed/selected. Note. To clear the date entry box; use the ``Clear`` button on the date picker popup.
Claim Date FromType in a date; or use the Date Selector (Tab. 18), to search for claims with a
Claim Date Fromwhich is on or is greater than the date typed/selected. Note. To clear the date entry box; use the ``Clear`` button on the date picker popup.
Claim Date ToType in a date; or use the Date Selector (Tab. 18), to search for claims with a
Claim Date Towhich is on or is less than the date typed/selected. Note. To clear the date entry box; use the ``Clear`` button on the date picker popup.
Visit TypeSelect type of out-patient visit or in-patient admission from the list of types of visit to search for claims made on specific visit/admission type.
Claim Selection Update Panel
This panel is basically for functionality of updating multiple claims which are currently loaded in the Result Panel at once basing on the claim filter criteria available on this panel. The update on the claims is basically changing Feedback Status and Review Status of a claim from Idle to Selected for Feedback or Selected for Review respectively. The filters in this panel work on the claims which are currently loaded on the result panel. The combination of filters is either
Selectand eitherRandomorValuecombination ofValueandVariance.
SelectA selection dropdown box to select between Review Select and Feedback Select to filter only claims whose review status is Idle or feedback status is Idle respectively from among claims currently in the Result Panel.
RandomAccept a number which is considered to be a percentage of the claims in the Result Panel. Check the random checkbox and enter a number on the text field next to checkbox. The default is 5%.
ValueAccept a number which is considered to be claimed value. This will filter claims from the Result Panel by taking claims whose claimed value is equal or greater than the entered number in the Value text field. Check the value checkbox and enter a number on the text field next to checkbox.
varianceEnable to set a variance arround the
Valuespecified Percentage Variance = [(Claim Value Filter Value) – 1] * 100
filter buttonOnce desired criteria have been set and after clicking this button(Img. 37), then the claims currently displayed in the result panel which satisfy the criteria, a reduced number of claim will be dispalyed in the result panel
bulk updatesOne can select them all (Img. 36) then by clicking on the 3 dots(Img. 38) more advanced actions (Img. 39) will be displayed
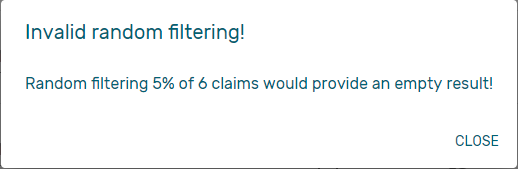
Img. 32 Error message when the filter have no result
A notification will be displayed to confirm display the action result(Img. 33)

Img. 33 Claim Review Action Notification
Result Panel
The Result Panel displays a list of all claims found, matching the selected criteria in the search panel. The currently selected record is highlighted with light blue, while hovering over records changes the highlight to yellow (Img. 34).
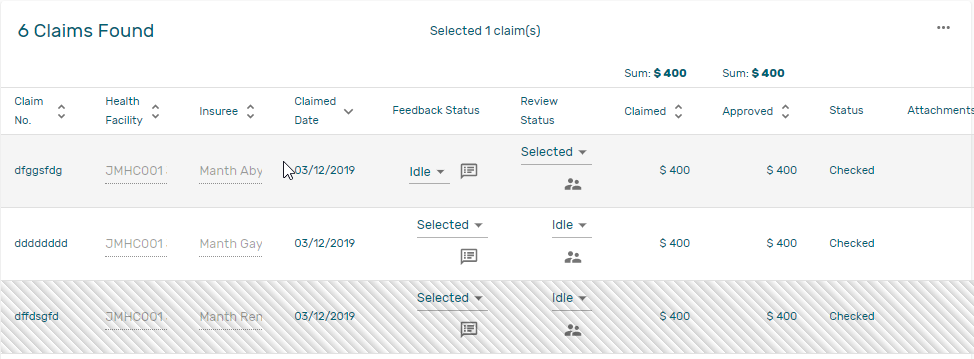
Img. 34 Claim Review Search Result: Selected (light grey), record updated (zebras)
Per default 10 records can be displayed at one time in a scroll panel but this number can be changed (Img. 43, the default value can also be changed in front end configuration), Further records can be viewed by changing pages (Img. 42).
The Feedback and Review Status Columns in each row contain a drop down list with options for claim feedback status and claim review status. A user can change the claim feedback and review status to Idle to Not Selected or Selected or Bypass. the change will take effect directly in an asynchronous mode, a notification will indicate the result of the update (Img. 35)

Img. 35 Selection of claim for feedback/review notification
Deliver ReviewClicking on this button (Img. 41) re-directs a user to the Claim Review Page, where a claim with review status Selected for Review can be reviewed and its current review status changed to Reviewed. If the claim is not in the status Selected for Review then the claim can be only loaded and shown to the user without any subsequent action.
Deliver feedbackClicking on this button (Img. 40) re-directs a user to the Claim Feedback Page, where a claim with feedback status Selected for Feedback can be feed backed and its current feedback status changed to Delivered.
Actions Menu
The Action menu is used in conjunction with the current selected record (highlighted with light grey). The user should first select a record by clicking on any position of the record or by clicking on
Select All(Img. 36)
Tab. 5 claims review actions¶ 
Img. 36 Select all

Img. 37 Filter button

Img. 38 tree dots
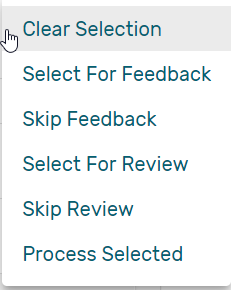
Img. 39 review actions menu
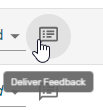
Img. 40 Deliver Feedback Button
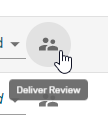
Img. 41 Deliver Review Button

Img. 42 Page browser
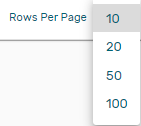
Img. 43 Change the number of record per page
Clear Selection:Unselect the selected claims
Select For Feedback:set the feedback status of the selected claims to Selected
Skip feedback:set the feedback status of the selected claims to Not Selected
Select For Review:set the review status of the selected claims to Selected
Skip Review:set the review status of the selected claims to Not Selected
Process selected:Process the selected claim with the status Checked, once processed the claims will have the status
Processed:this means that the valutation will be done against the cieling and deductible configure on the product page
Information Panel
The Information Panel is used to display messages back to the user. Messages will occur once a claim has been reviewed, updated, feedback added on claim or if there was an error at any time during the process of these actions.
Claim Review Pag
Data Entry
Img. 44 Claim Review Page
Claim Review Pagewill show read-only information of the current claim selected for review, on the top section of the page, on some of the grid columns of the claim services grid and claim items grid and on the bottom of all the grids. As well, the page has input boxes where a user with the system role Medical Officer or with a role including an access to Claims/Claim/Review can enter new relevant values for review of the current claim.
Read-only information of the current claim
HFThe health facility code and name which the claim belongs to.
Main Dg.The code of the main diagnosis.
Sec Dg1The code of the first secondary diagnosis.
Sec Dg2The code of the second secondary diagnosis.
Sec Dg3The code of the third secondary diagnosis.
Sec Dg4The code of the fourth secondary diagnosis.
Visit typeThe type of the visit or of the hospital stay (Emergency, Referral, Other)
Date ProcessedThe date on which the claim was processed (sent to the state Processed).
Claim AdministratorThe administrator’s code, who was responsible for submission of the current claim.
Insurance NumberThe insurance number of the patient
Claim No.The unique identification of the claim within the claiming health facility.
Patient NameThe full name of the patient on whom the claim is made
Date ClaimedThe date on which the claim was prepared by the claiming health facility
Visits Date FromThe date on which the patient visited (or was admitted by) the health facility for treatment on which the claim is basing on
Visit Date ToThe date on which the patient was discharged from the health facility for treatment on which the claim is basing on
Guarantee No.Identification of a guarantee letter.
ClaimedThe sum of prices of all claimed services and items at the moment of submission of the claim.
approvedThe value of the claim after automatic checking during its submission and after the corrections of the claim done by a medical officer.
AdjustedThe value of the claim after automatic adjustments done according to the conditions of coverage by the patient’s policy.
ExplanationExplanation to the claim provided by the claiming health facility.
claim statusClaim status is shown on the very bottom right end side after the two grids. This is status which claim gets after submission.
Editable information of the current claim
AdjustmentEnter a text summarizing adjustments in claim done by a medical officer.
Services and Items data entry grids.
Approved Quantity (app.qty)Enter a number of approved provisions of the corresponding medical service or item.
Approved Price (app. price)Enter an approved price of the corresponding medical service or item.
justificationEnter justification for the entered corrections of the price and quantity of the medical service or item.
statusSelect either the status in the claim Passed or Rejected for the corresponding medical service or item respectively.
rejection reasonThe last column of each of the two grids, headed with character ‘R’, gives rejection reason number for each of the claimed services or claimed items in the claim services grid or the claim items grid respectively. Rejection reasons are as follows:
The rejection description is displayed on the screen when the mouse pointer is above the given line (Img. 45)
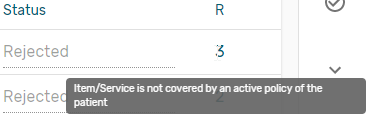
Img. 45 Image Rejection Description
Reason Code Reason Description -1 Rejected by a medical office 10 Accepted 1 Item/Service not in the registers of medical items/services 2 Item/Service not in the pricelists associated with the health facility 3 Item/Service is not covered by an active policy of the patient 4 Item/Service doesn’t comply with limitations on patients (men/women, adults/children) 5 Item/Service doesn’t comply with frequency constraint 6 N/A 7 Not valid insurance number 8 Diagnosis code not in the current list of diagnoses 9 Target date of provision of health care invalid 10 Item/Service doesn’t comply with type of care constraint 11 Maximum number of in-patient admissions exceeded 12 Maximum number of out-patient visits exceeded 13 Maximum number of consultations exceeded 14 Maximum number of surgeries exceeded 15 Maximum number of deliveries exceeded 16 Maximum number of provisions of item/service exceeded 17 Item/service cannot be covered within waiting period 18 N/A 19 Maximum number of antenatal contacts exceeded Saving / Reviewing
Once appropriate data is entered, clicking on the
Savebutton (Img. 16) will save the claim review and set the reivew status todeliver; a message confirming that the claim has been saved will appear on the Information Panel.data entry validation
If inappropriate data is entered at the time the user clicks the
Savebutton, an error message will appear in the Information Panel, and the data field will take the focusBack
By clicking on the
backbutton (Img. 17), the user will be re-directed to the Claims Overview Page.
Claim Feedback Page
The Claim Feedback page will show read-only information of the current claim selected for feedback, on the top section of the page it has input boxes where a user with the system role Medical Officer or with a role including an access to Claims/Claim/Feedback can enter feedback on the current claim or where the user can read a feedback delivered by enrolment officers.
Data Entry
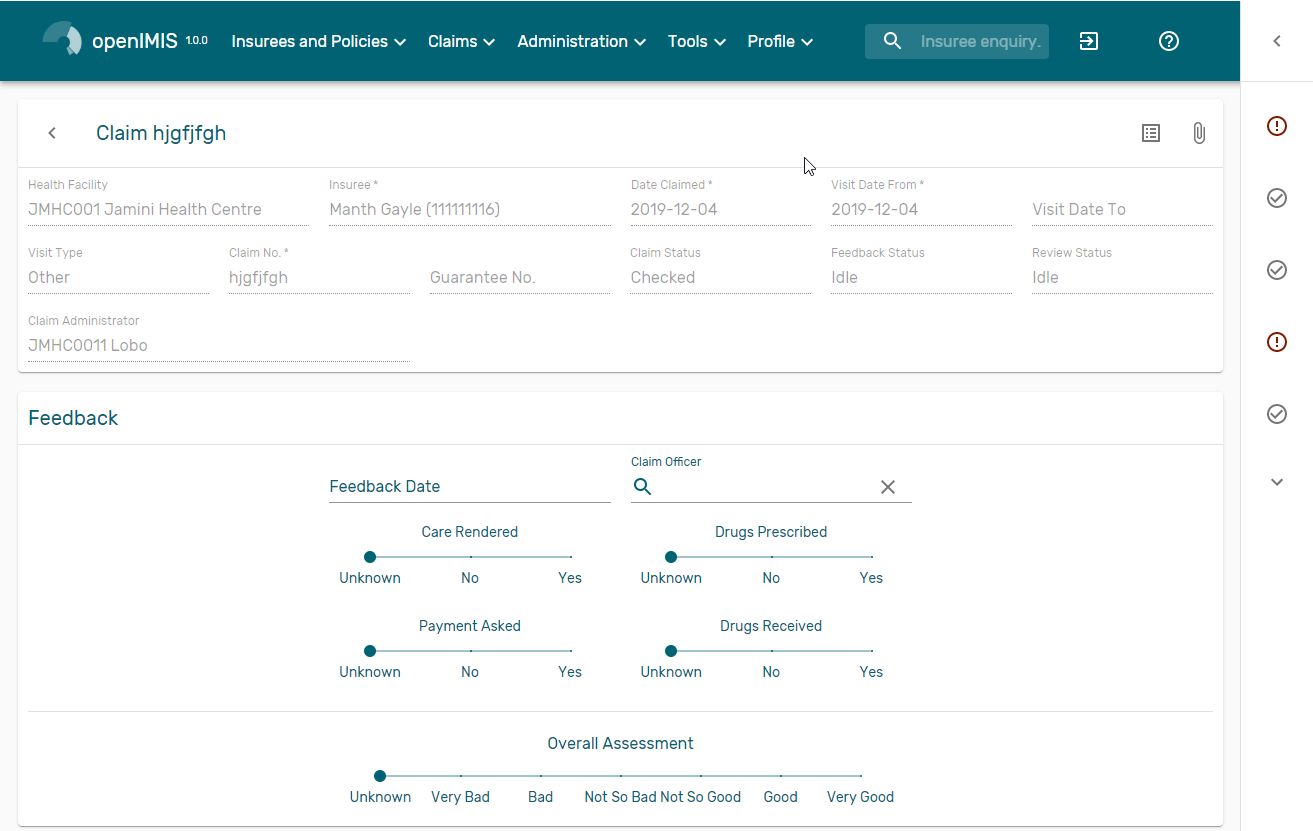
Img. 46 Claim Feedback Page
Read-only data of the feedback includes in the section Claim the following:
Health FacilityThe health facility code and name which the claim belongs to.
InsureePatient/beneficiary names and insurance number
Date ClaimedThe date on which the claim was prepared by the claiming health facility
Visits Date FromThe date on which the patient visited (or was admitted by) the health facility for treatment on which the claim is basing on
Visit Date ToThe date on which the patient was discharged from the health facility for treatment on which the claim is basing on
Visit TypeType of visit covered by the claim (emergency, referal, other)
Claim No.The unique identification of the claim within the claiming health facility.
Guarantee No.Identification of a guarantee letter for prior approval of provision of claimed health care.
Claim StatusThe status of the claim.
Review StatusThe status of the claim with respect to reviewing.
Feedback StatusThe status of the claim with respect to feed backing.
Claim AdministratorThe administrator’s code and name, who was responsible for submission of the current claim.
Modifiable data of the feedback included in the section Feedback the following
Feedback DateType in a date of collection of the feedback; Clicking on the field will pop-up an easy to use, calendar selector (Tab. 18); by default the calendar will show the current month, or the month of the currently selected date, with the current day highlighted.
Enrolment OfficerSelect an enrolment officer from the list of enrolment officers, by clicking the arrow on the right side of selection field. The enrolment officer collects feedback from the patient.
Care RenderedSelect ‘Yes’ or ‘No’ from the slider
Payment AskedSelect ‘Yes’ or ‘No’ from the slider
Drugs PrescribedSelect ‘Yes’ or ‘No’ from the slider
Drugs ReceivedSelect ‘Yes’ or ‘No’ from the slider
Overall AssessmentChoose one level among the six levels available from the slider
Saving
Once all mandatory data is entered, clicking on the
Savebutton (Img. 16) will save the feedback on current claim. The user will be re-directed back to the Claims Overview Page; a message confirming that the feedback has been saved will appear on the Information Panel. If inappropriate data is entered or mandatory data is not entered at the time the user clicks the Save button, an error message will appear in the Information Panel, and the data field will take the focus.Back
By clicking on the
backbutton (Img. 17), the user will be re-directed to the Claims Overview Page